This morning has been very productive. I think the planets aligned to get my butt moving. The weather outside is fabulous, 70-some degrees out, low humidity, and a nice breeze. So all the windows are wide open to get some much needed fresh air in the house. I think todays prompt, Alexa’s visit, and the nice weather kind-of kicked my butt into action and started to tidy up the house a little. Nothing huge, just small things that can make all the difference. Our house is slowly starting to feel like ours, but in small bits.
BUT before going on reading, check out my tea giveaway! All you need to do is comment, and if you follow on me on facebook, instagram, or whatever you get bonus entries, so check that out and enter! What type of tea? Raspberry, Vanilla, and Peppermint flavored Green Tea. It is one of my favorites.
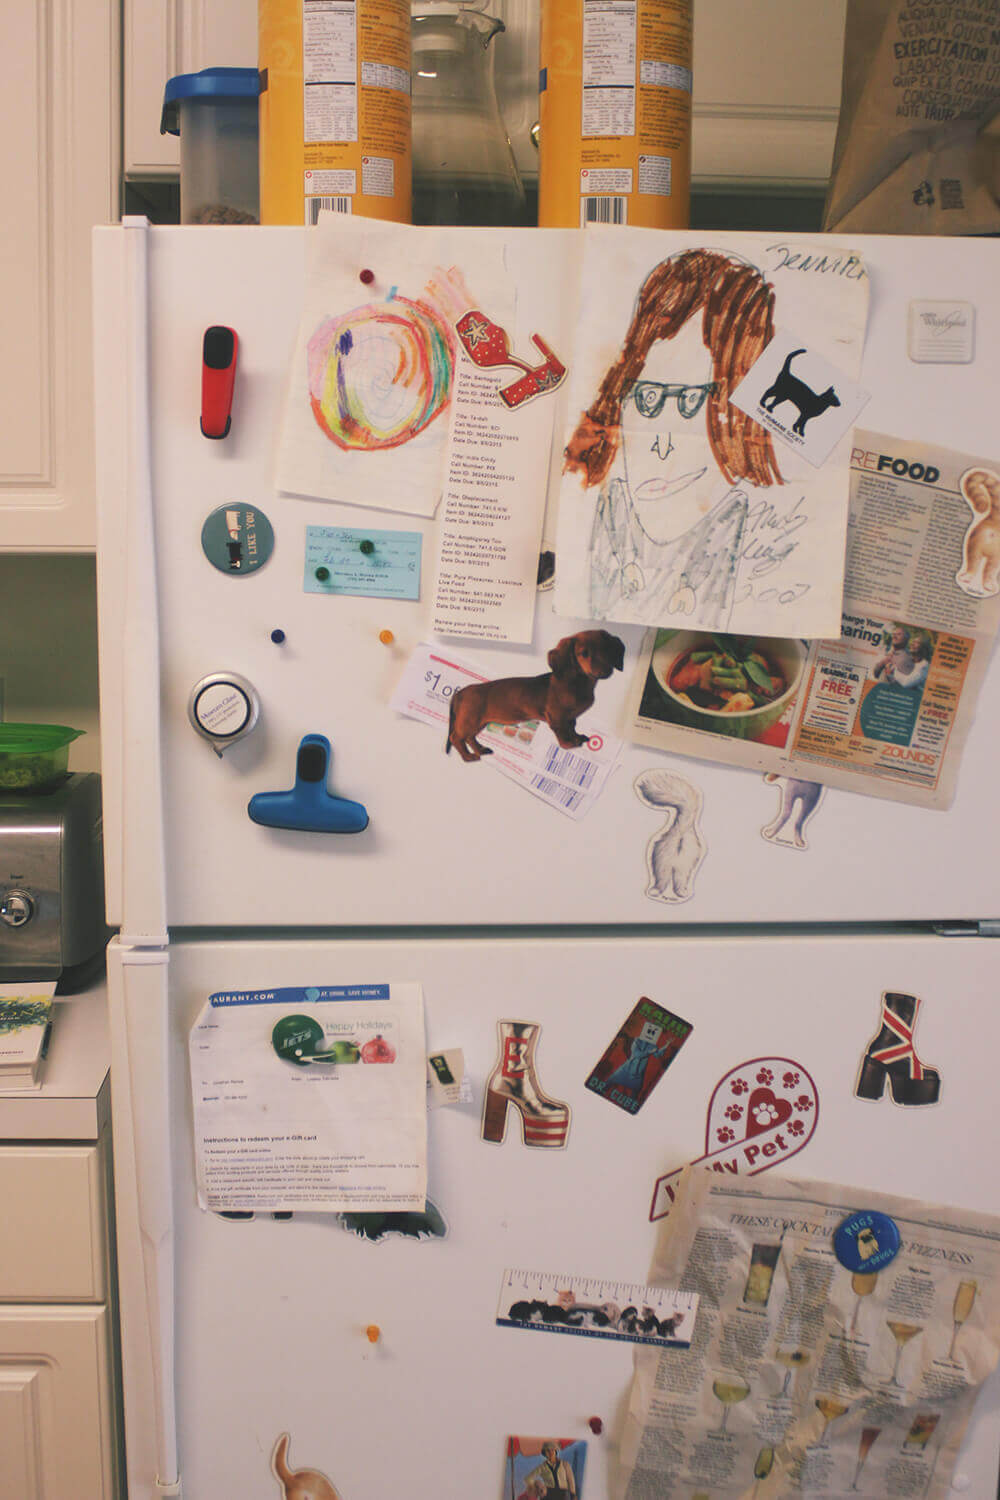
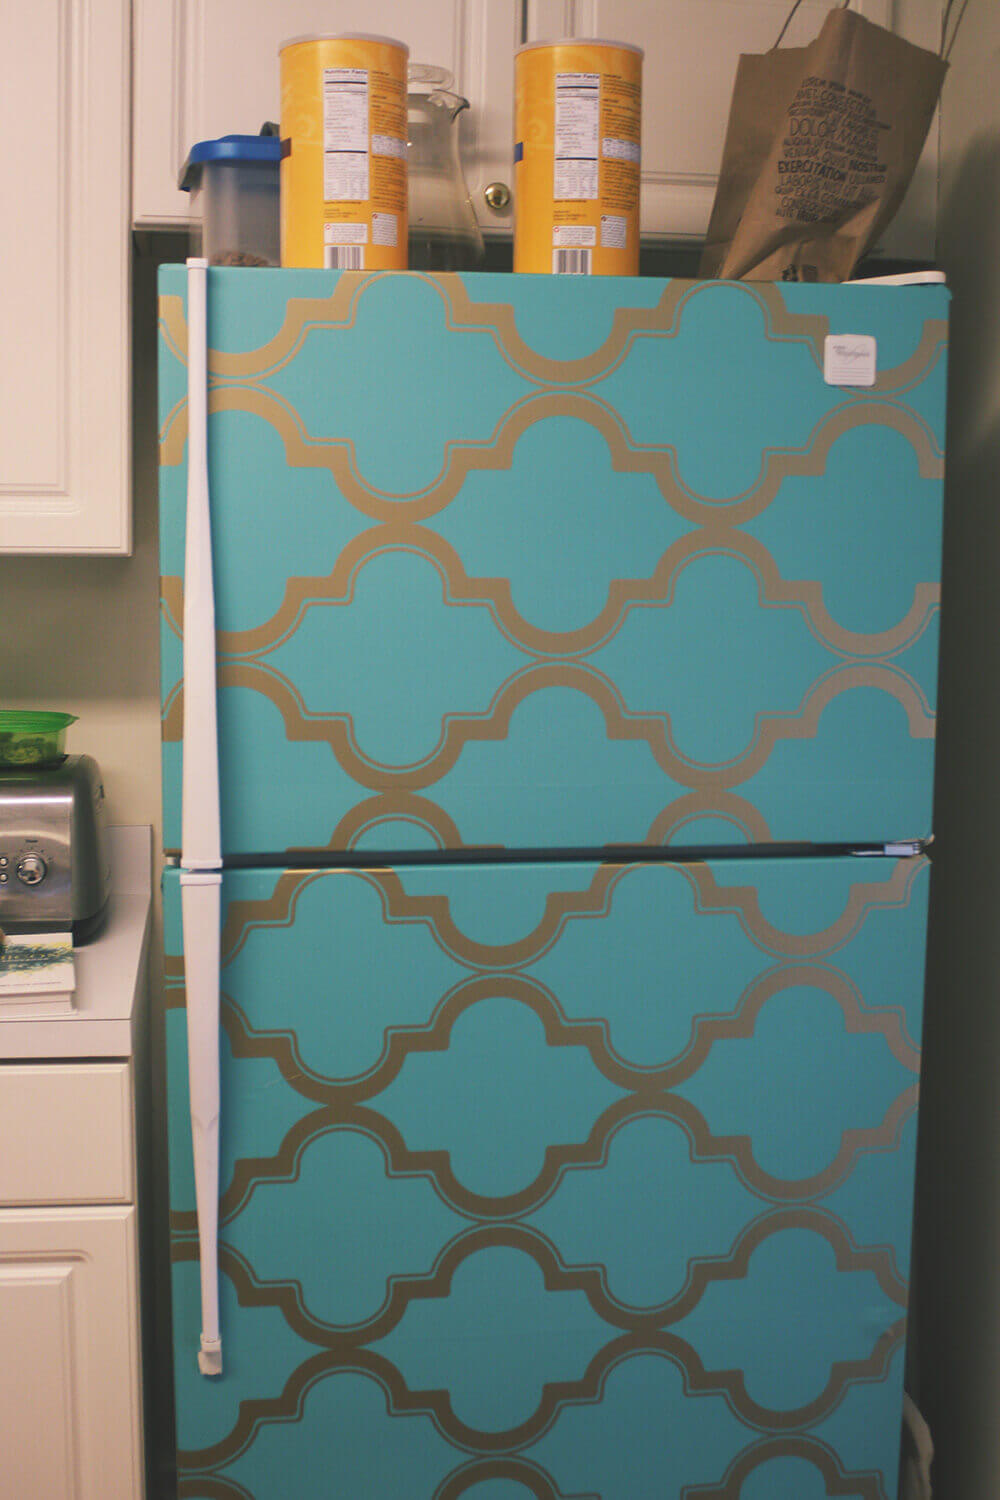
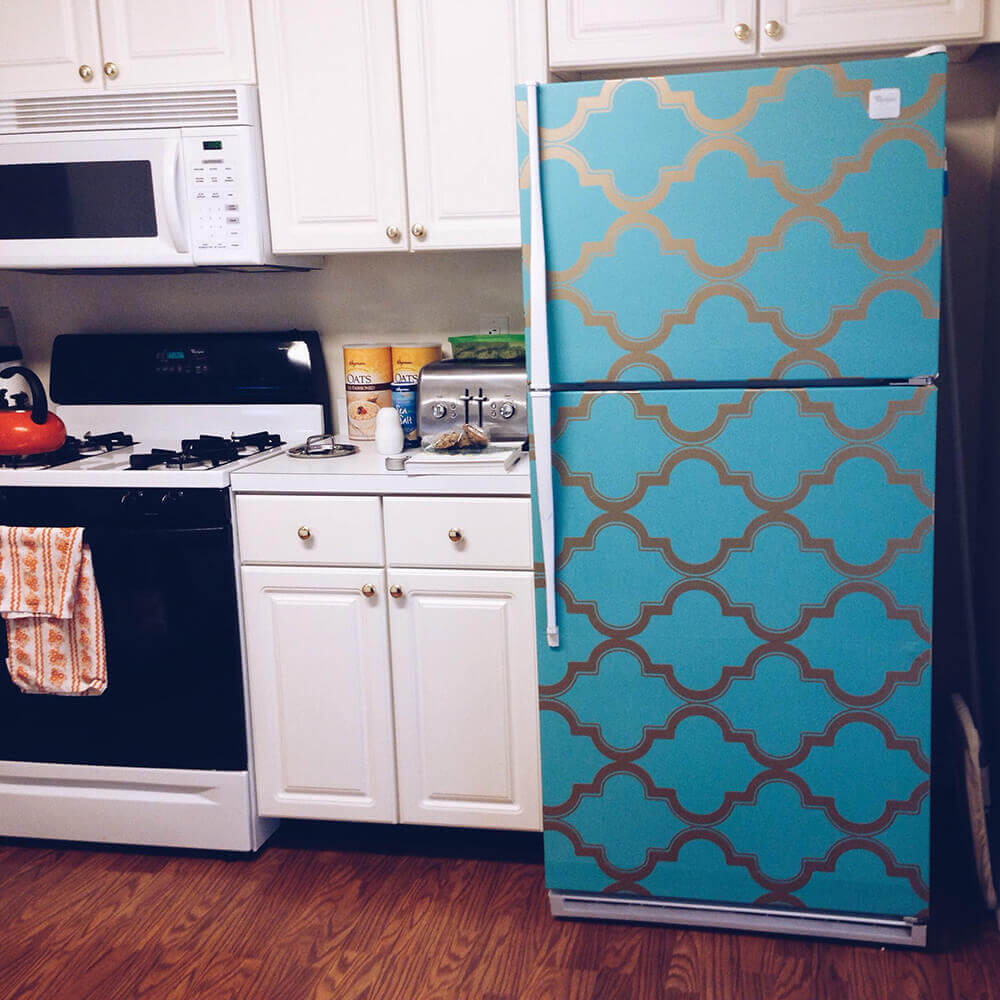
As I mentioned a few times, we recently moved, and it is taking awhile to make our house feel like our home. The biggest battle is that we need new furnature, as we tossed some junky stuff when we moved. So our kitchen is a little chaotic with pantry foods, and barware. We haven’t opened up half of our cocktail/beer/wine glasses because we need a hutch/jelly cabinet. We also need some sort of book shelf for the cookbook which are on the floor. Oh and our fridge is 19 years old…..
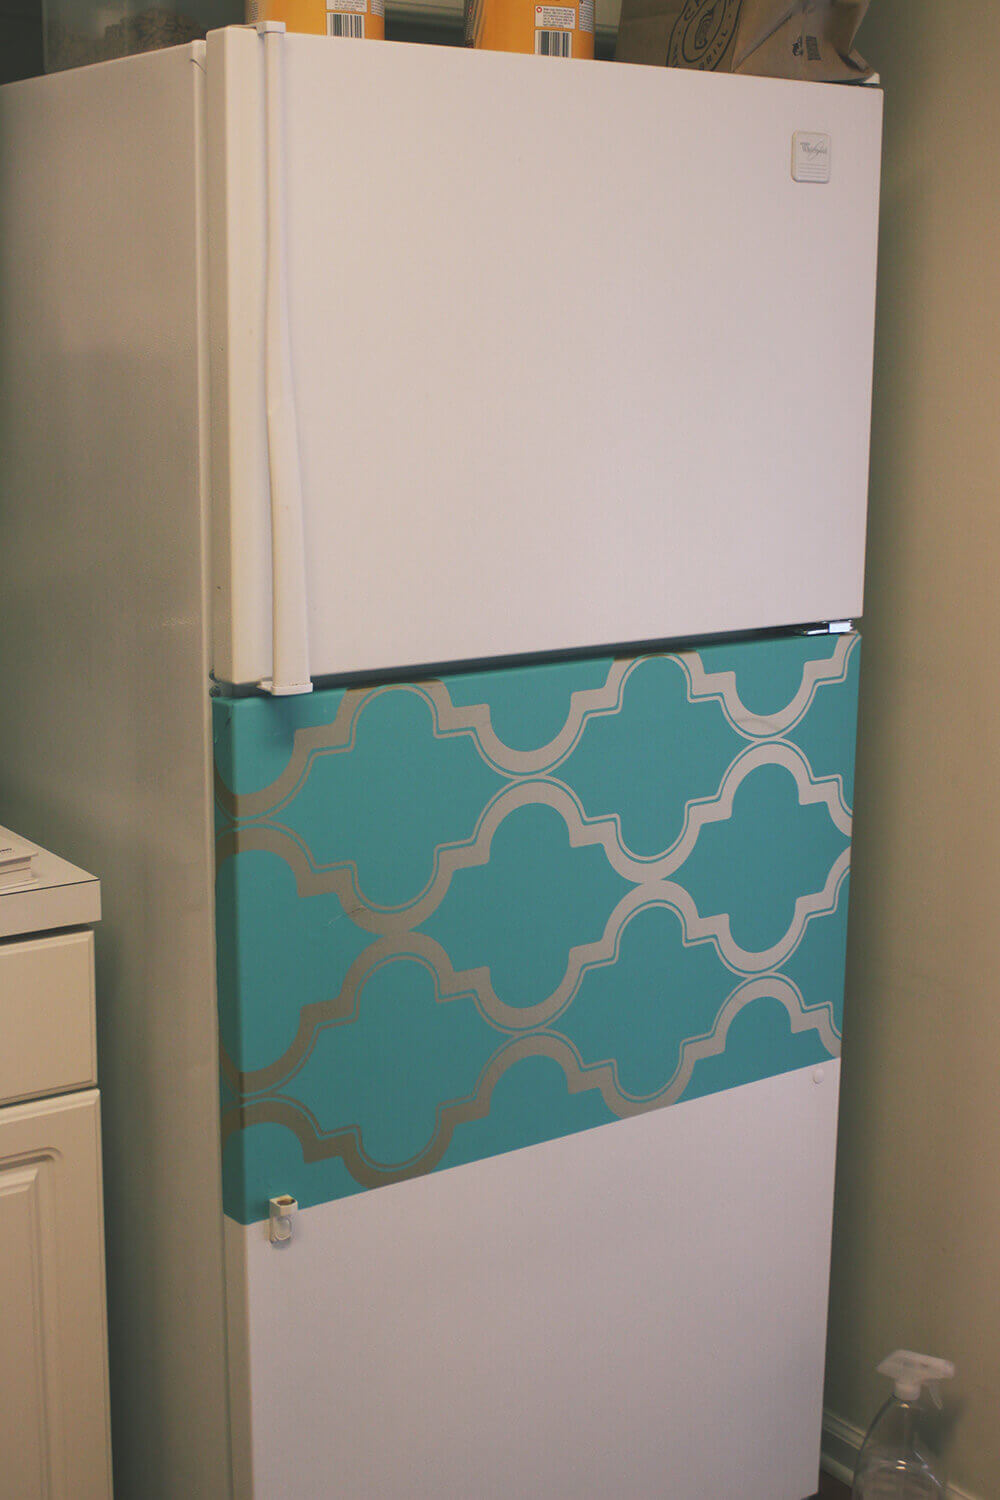
Our fridge is pretty boring. nothing crazy going on. When my husband and I saw how average it was, I asked if I could try out wallpapering the fridge if it was really old. I was thinking old being 10 years, but once I took a closer look I found out that it was 19 years old! Never would of guessed that. We are saving up to buy a new fridge, in anticipation of it breaking down at random. But for now I am making it pretty.
So this isn’t a tutorial, because I think it is a little insulting to make a tutorial of how to put paper on your fridge a tutorial. But I will give little bits of tips for you. One if you haven’t seen the wallpaper on fridge thing, let me guide you to this article and this article on The Kitchn. They give some pictures of what other people had done. I was a little nervous because I had never used removable wallpaper before. So here is what I did:
- Remove handles on the fridge. You can find tutorials easily online- though every fridge is a little different. I couldn’t remove the bottom half of the handles so that made things a little tricky. But it helps A LOT, so if you can’t get the whole thing off, don’t just poo-poo the extra work. It is worth it.
- Clean the fridge door. Super important so you don’t just cover weird funk, but it will help the paper stick for longer periods of time.
- Pre-cut the first sheet, then try laying it down all at once, fixing bubbles afterwards. I tried laying one half down then smoothing it down, it didn’t work. This might vary from brand to brand. I used Target’s line of wallpapers, so I found that it stretched to much for the lay down a corner and smooth as you lay the rest down method. Smack it down where you want it, then smooth it out. If you lay it down in one go and get a bubble, you can probably peel a corner off to the bubble and re-smooth out.
- Smooth with your hands. NOT WITH A RULER! I saw some tutorials do this, but it just messed up the finish for me. This could of been because I was using a shiny eggshell like finished wallpaper. If your using wallpaper that is glossy or a contact paper, this might not be a problem.
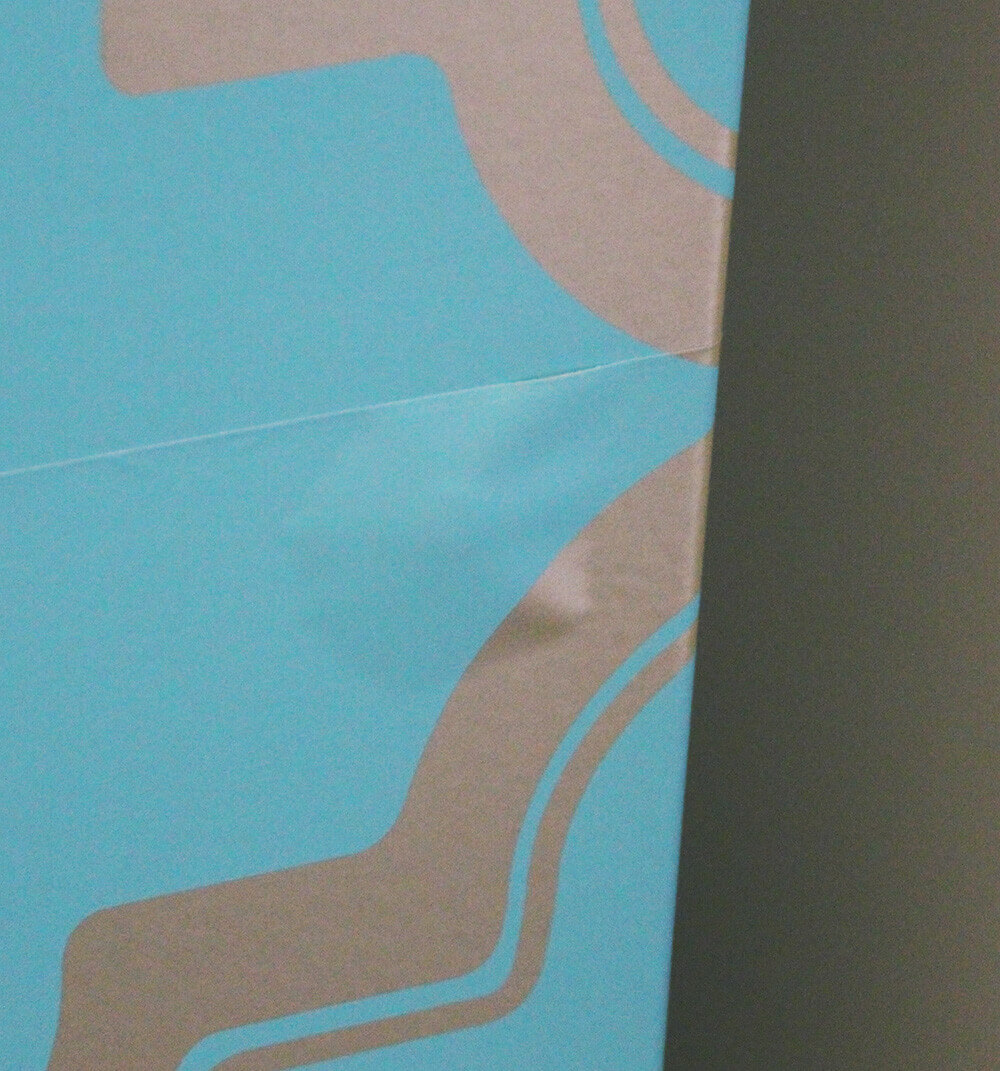
- When placing the second piece of paper, don’t cut to the exact size. I took the roll, matched the design, make a rough spot to trim, and cut. The piece was oversized, but once I placed it on the fridge, I trimmed to the exact size I needed once it was attached. Since I rolled the paper over the edges, you only notice the imperfections when you open the fridge doors. So only you know about it.
- I only did the doors because I didn’t have quite enough wallpaper. I probably would have enough if I didn’t have to match the design up. If your pattern is big, you will waste more paper matching up the designs. Keep in mind your fridge size as well. I have a small fridge for an American house, so if it was bigger I probably would of just gone with two rolls from the start.
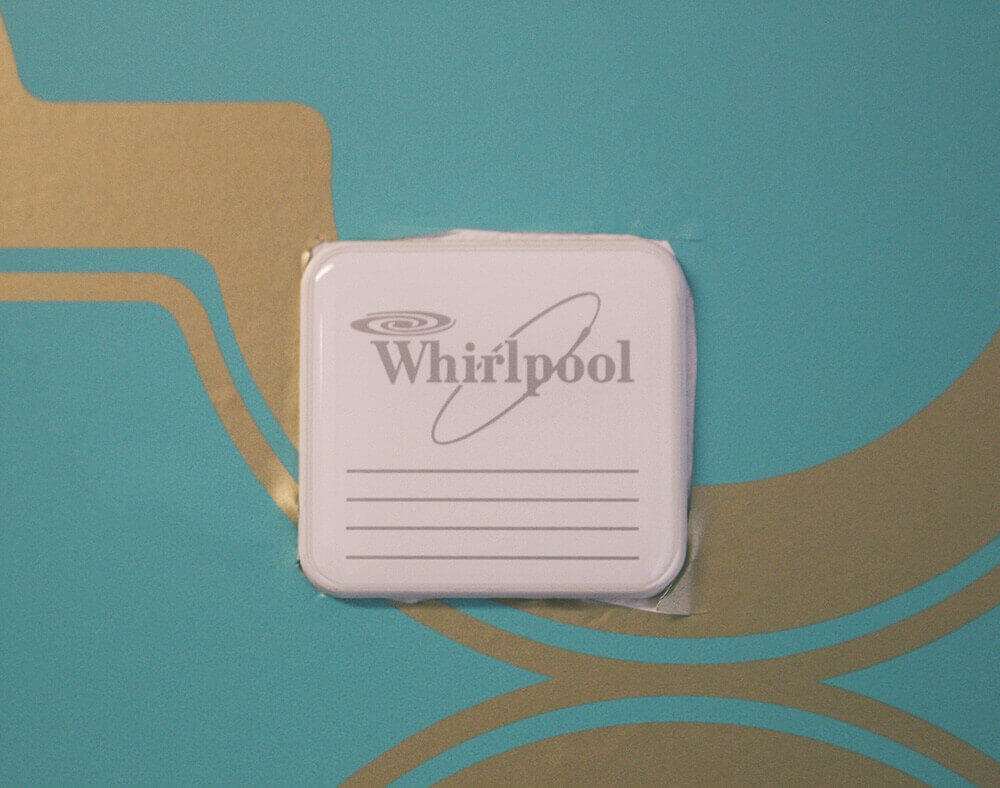
- It WON’T BE PERFECT! Accept it. Your fridge is not made for removable wallpaper, so there are going to be lumps and bumps out of your control. There was a weird button on the front of my fridge, that I think was made so you could put the handle on the other side. There was also the logo of the company on the top, which I had to cut around, which was pretty hard! Up close they suck, but they look fine from far away.
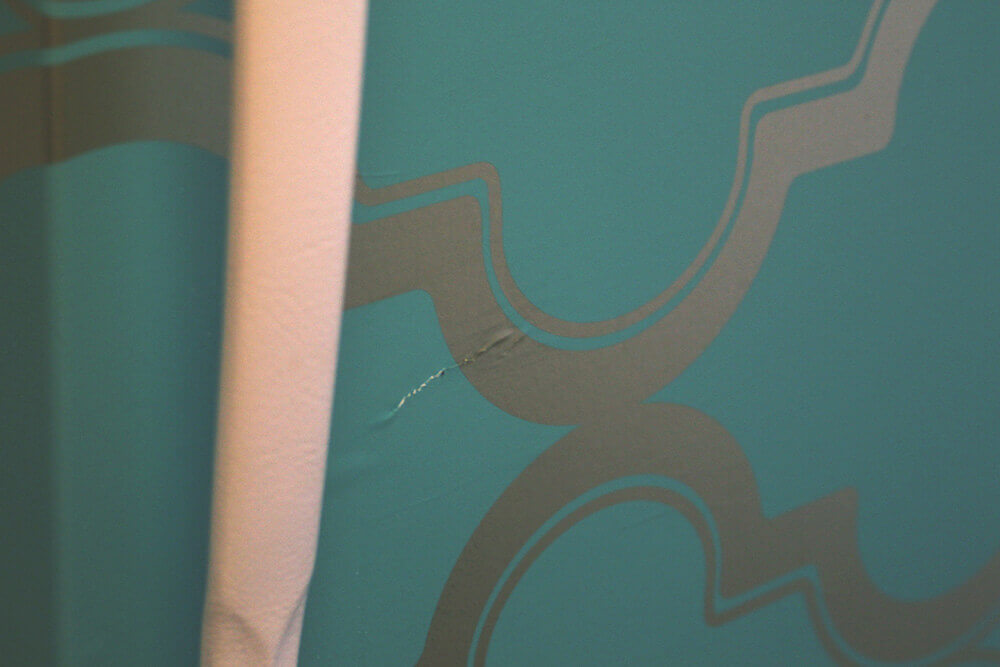
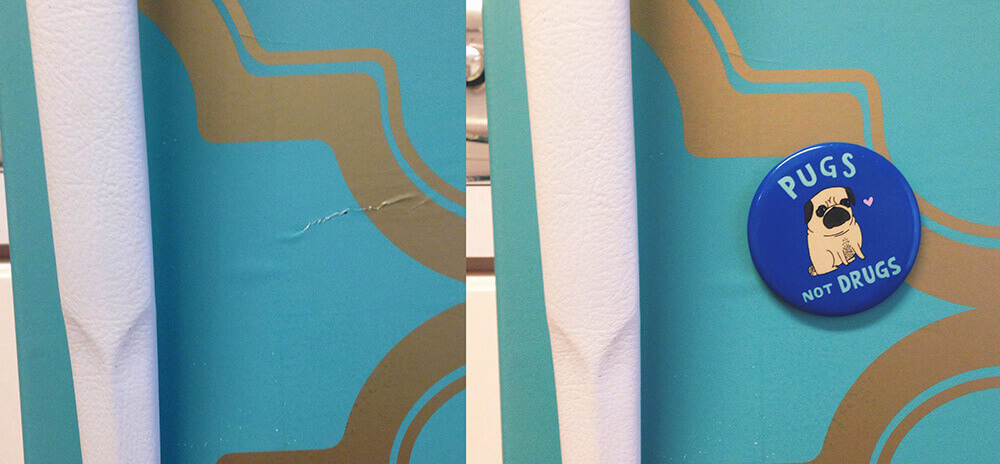
- Once you are finished, place magnets on spots that got messed up. Duh! That rip from the beginning? Oh I just placed a magnet over it, and now it doesn’t bother me on a day to day basis.
- This is a great thing to do for renters! If I knew of this idea when we were renting, I probably would of tried this! I am not sure about the overall “stickiness” factor that might happen over the years. So if someone has used removable wallpaper before, please share what you experienced.
- I’ve seen tutorials where people use cardboard, box cutters, and rulers to cut these. Do yourself a favor, get a super sharp exacto knife or a safety razor blade to cut the paper with. Also invest in a quilters ruler and a cutting mat board with a grid. Why? The quilter’s ruler is clear and has a grid so you can get more precise 90 angles. And having a grid on a cutting board helps you line the paper where you need it to, and making sure your ruler isn’t angled.
- Practice with laying contact paper. I never had to move when I was little so I never used contact paper until my Mother-in-Law suggested it for our apartment. I used scissors and it was awful. Then I stepped up my game in the house and used rulers and cutting mat board. IT WAS AWESOME! It was great practice for cutting sizes and learning how to lay the paper flat to avoid bubbles.
- If you aren’t going to make the paper match for the freezer and fridge, make sure you missmatch them enough. After laying all the paper down, it looks like the top and bottom aren’t matching, but they are really close to matching. If I knew this, I would of “missmatched” them more.
- Don’t overlay the paper. Towards the bottom I used a scrap to cover the bottom. In order to use it, I kind-of went over some paper that was already down. You cna see where the pieces overlap. You can kind-of see it on the photo above (near the bottom of the fridge door.) Again, nothing huge but I would of tried to avoid it if I had to do it again.
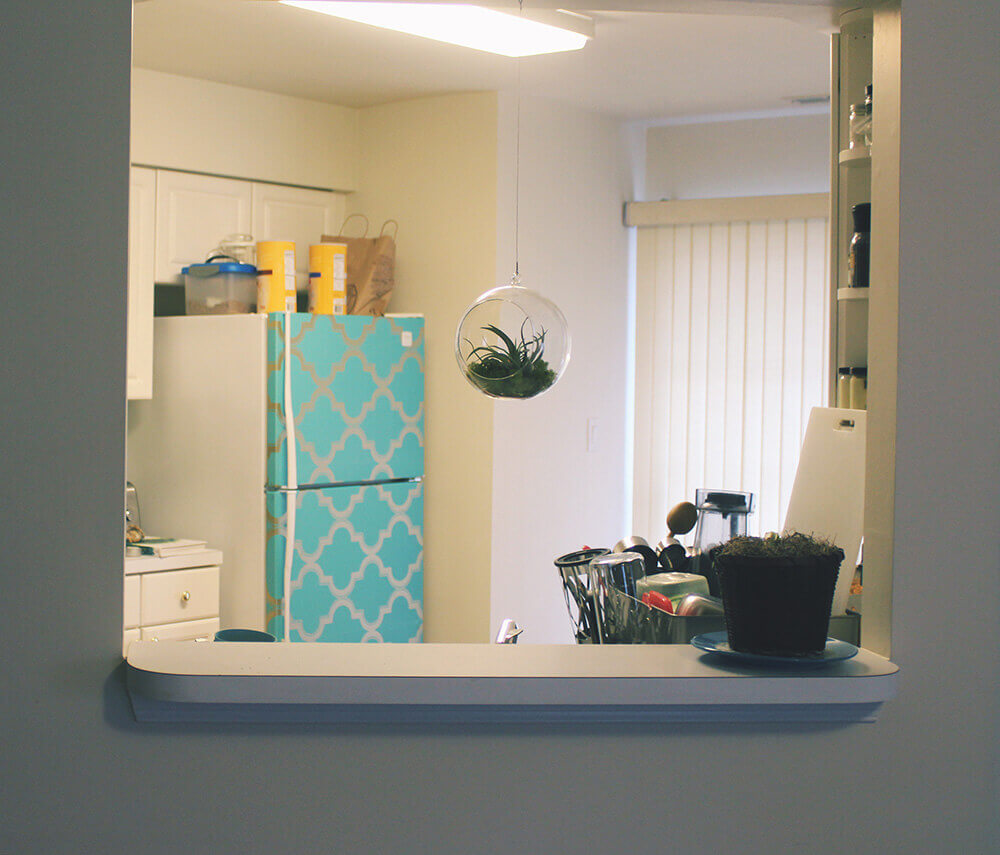
So what do you guys think? I think this was totally worth doing, and it adds a nice pop of personality to my kitchen. It is a decent kitchen, but very boring. Wood lament floors, white cabinets, white counter tops, and creamy-off-white walls. If I want there to be something unique in the kitchen I am going to have to replace or add.


Veganopoulous
That is BEAUTIFUL! Gorgeous colour and a great idea!!!
Jennifer
This is SUPER cool! Have to look into it!
Little Vegan Bear
LOVE that fridge 😀